Bulking and Cutting

Bulking and Cutting: Do I need them both?

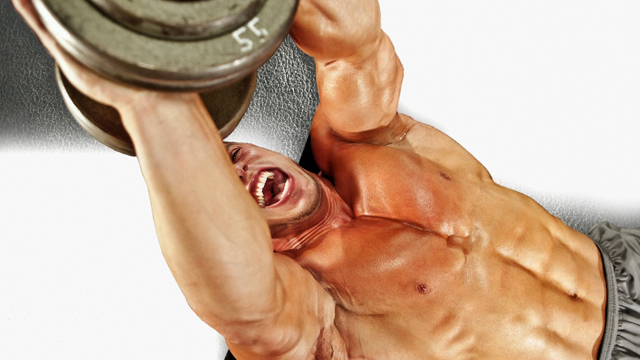
If you’re looking to pack on some serious mass then it’s time that you start taking your diet seriously. The muscle will not come if you aren’t giving your body what it needs, when it needs it. So I want to explain the “Bulking and Cutting” method a little more…

This approach has been used by many bodybuilders, fitness models and regular, every day people who want to transform their bodies into solid muscle with very low body fat levels. And to say the least, bulking and cutting works! There are so many different ways to go about cycling to two phases of bulking and cutting, but no matter how you apply it, both will absolutely work to your benefit.

I’ve heard so called “fitness experts” claim that it is impossible to gain muscle and lose fat at the same time; that the only way to effectively do this is to separate it out into two phases: bulking and cutting. In my opinion this is completely wrong. And I’ll explain why…

-To gain weight, you must consume more calories than you burn off in a given day.

-To lose weight, you must burn off more calories than you take in on a given day.

HOWEVER, if you know how many calories you burn off in a given day, you are now able to “fine-tune” your diet to compliment BOTH muscle gain and fat loss. This is assuming that you are performing some sort of cardio interval workout as well as weight training on that day. The cardio interval will reinforce the fat loss, and the weight training will reinforce muscle gain. It is impossible to GAIN weight on a cutting diet, however it IS possible to LOSE FAT on a bulking diet.

Let’s say that your calculated caloric needs for a workout day is 4000. 2000 of these calories are burned at rest, 1000 are used for basic daily activity and sleep, and the last 1000 are used for your workout. If 500 calories were used up while doing interval cardio, then that is 500 calories of fat that your body used for energy. This equals FAT LOSS.

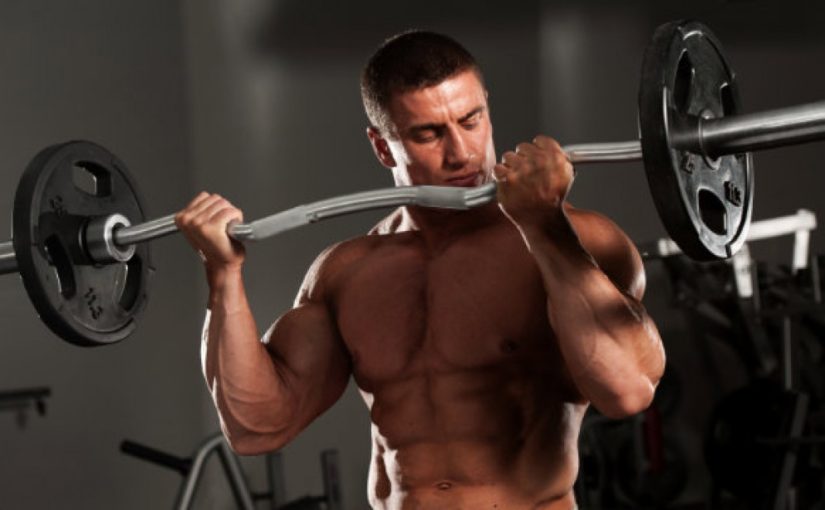
During your weight training, you burned 500 calories as well. To make sure that you’re adding muscle to your frame, you must consume at least 500 more calories a day to aid in muscular development. (Your body needs energy to build muscle!)

If 500 calories of fat were already used up by the body, then adding those extra 500 calories will NOT go towards fat storage; they’ll be used to build up new muscle! Does that make sense?

These are just rough estimate numbers but hopefully you’ll see my point. Your body may require more energy and calories to aid in muscle growth but this will all be determined by individual calculations of your own caloric needs. I’ll be sure to post this formula later on!

Back to bulking and cutting…

Bulking can be simply described as gaining weight. The primary focus of this phase is to add as much muscle to your body as possible, even if it comes with some fat storage as well. This will require many extra calories to ensure that muscle growth continues. Once you’ve packed on enough size, then it’s time to cut all the excess fat and keep as much of your hard-earned muscle as possible. This is referred to as the “cutting” phase.

I recommend this type of cycle because it allows your mind to focus on one goal at a time, instead of two. But as I said earlier, it is not impossible to do both at the same time! It just may take a little longer and your diet must be near perfection. If you’re young and skinny then don’t worry about adding extra fat. Your metabolism will take care of itself, so take advantage of eating as much as possible, while still eating clean. If you’re heavier, make sure your diet is on point, and get to a weight you feel comfortable at before any bulking begins.

If you have any questions just ask!

-Mitch Muller

C.P.T MindsetFitness.net – Bulking and Cutting


Triceps Training

Triceps Training: The Right Way

As you all may know, having big arms is a standard in the bodybuilding community. If your arms are small, you look small, period. So in effort to overcome and bypass this pitfall in your muscle-building journey, most will succumb to more intensive bicep work; Which, more often than not, will lead to some sort of overtraining, or lopsided-looking arms. What most young lifters fail to understand is that the bicep only makes up one-third of your arm mass; the other two-thirds belong to the triceps! So you may now see the importance of focusing more of your attention on this muscle.

The tricep brachii is a three-head muscle (hence the prefix “tri”). The heads consist of the Long, Medial, and Lateral head. An effective, mass-building tricep workout will always target each of these three at some point or another. The tricep is also a very easy muscle to isolate, so hard work and exercise selection will be the two main factors to assess.

So what exercises are the best for tricep development? It is very easy to fall into this confusion of what exercises may do the trick, and which may not. An already written up arm workout from a bodybuilding magazine may work for the person who wrote it, but what if it just doesn’t seem to work for you? Then again, most magazine workouts are BS anyway to begin with. If you’ve run into this problem then don’t worry, many of us have been in the same boat. From experience with my clients and my own workouts, I’ve come to the conclusion that each arm must do the work at some point by itself. The brain will always send more nerve impulses to the dominant side of your body regardless of the muscle being trained. I’m not saying that barbell tricep movements are ineffective, but as far as full and exact stimulation to BOTH triceps go, dumbbells will work hands down.

An array of different exercise types will give your arms the size or muscle tone you’re looking for, not JUST one type individually. Cables, machines, and body weight exercises will also do the trick when used at the right times. I could go on all day about the numerous variations of tricep work, however there is no need. I’ll keep it plain and simple…

[magicactionbox]

Steps to maximum tricep development:

1.   Establish a pump

Getting the maximum blood flow to your muscle is extremely important to how much effort it’ll  give you. This can be done by warming up the tricep with lighter weight, and with slow and controlled movements.

triceps

2.   Go heavy

Once the pump is established, it’s time to hit em’ hard! Heavy compound exercises like the close-grip bench press, skull crushers, or behind the head tricep extension will work the best here.

3.   Variety

A stimulated muscle will always respond to new exercises given that the triceps have grown and already adapted to the current exercises first. Switch up your routine every few weeks to keep your arms growing!

4.   Stress and Form

Never sacrifice form for adding additional weight. Perfect form provides perfect results. The stress on the muscle must also gradually increase with time in order for the muscle to grow.

5.   Feeling

Focus on feeling the muscle, not just the weight. Creating a mind/muscle connection is extremely important for maximum muscle stimulation.

6.   Isolation

Once you’ve established a pump, and have completed your compound movements, move on to isolation exercises. The compound sets recruit more muscle-fibers than that of isolation sets, so it is important to isolate the triceps after. The long head is usually neglected here, so the “palms facing up approach” or kickbacks will get the job done.

Below are the best recommended tricep exercises for compound, and isolation…


COMPOUND

– Close grip bench press

– Skull Crushers

-Behind the head tricep extension

-Reverse close grip bench press

-Dumbbell roll-ups


ISOLATION

– Cable pushdowns

-Rope pushdowns/reverse

– Tate press

– DB kickbacks

– Elbow drops (Bodyweight)

– Single arm lying DB extension

-Single arm cable extension

-Dips (upright/seated)


Hope this clears up some things on tricep development! I will be posting exercise picture examples and videos in the Exercise tap if you are unsure on the form of any of these. Keep me posted on your experiences! Catch ya’ll later.


-Mitch Muller

CPT – MindsetFitness.net

Summary with credit to: Permanent Muscle by Reuben Bajada. The Poliquin Principles by Charles Poliquin. ACEFitness.org

3 Reasons To Train Your Legs

WHY SHOULD I TRAIN MY LEGS?

It doesn’t come as a surprise that leg day is one of the most feared and disliked days of any training split. In fact, I know guys who completely neglect their leg development altogether! We’ve all had some sort of thought run through our minds during the last few reps thinking to ourselves, “Should I keep going or should I just stop here?” The lactic acid build up seems to be too much to handle, and this is where most will throw in the white towel. I’m here to shed some light on this popular neglected training day, and hopefully by the end of this article, you’ll be more determined than ever to suck up the pain and push yourself through new barriers!

The larger muscles of the leg (ex: Quads/Glutes/Hamstrings) are relied upon in producing force and generating strength in many sports and exercises. The gym isn’t the only place where they’re forced to grow. Having a variety of leg training routines will keep the legs guessing, and keep you muscular hypertrophy at its highest. It’s important to remember that your legs are constantly supporting the load above them; adding additional weight is CRUCIAL for muscle growth and complete muscular fiber stimulation. So training your wheels each week should be at the top of your training priority list, or near the top. I’ll give you a few reasons why in a minute…

When a structured plan is put into place, each workout will be a constant progression from that of the one before it. Keeping a workout journal is the best way to ensure this happens. Record all of your sets, reps, weight, tempo and exercises. That way, when next week rolls around, you can flip back and prepare yourself for another day of progress; whether it’s one more rep, or a small addition of 10 pounds. Progress is progress. Just make sure you push yourself!

Here are a few reasons why leg training is important…

 1.   Squats/Deadlifts = more muscle!

You can find studies all over the place that show the squat and deadlift increase testosterone and growth hormone more than ANY other exercise! These are natural muscle building hormones. These exercises work your whole body, not just the legs alone. Your arms, abs, chest and back are all involved to some degree. That means more hormone flow to the upper body, all good things! So don’t leave these guys out…

2.   Mindset Strength

There’s no better feeling in the gym than to complete a HEAVY set of deads or squats. Throwing that weight around can be a huge mental workout saver and will leave you feeling stronger and more powerful than before. Your mindset will dictate your outcome. Your muscles need all of the brain power they can get!

3.   Body Symmetry

Ever seen that commercial with the buff guy sitting in a chair and the guy interviewing him asks, “Did you know that you’re supposed to train your legs too?” the camera zooms out and this huge bodybuilder has legs the size of a little kid. No one wants to be that guy, come on now. It may not be important what other people think, but if you’re taking your training seriously, it’ll be a lot easier to pack on the mass by developing your legs as well!

I’ll be going over each of the leg muscles individually in future articles, so I’ll touch on the exercises that will work best for mass development. Till then, train hard and prepare your mind for success. See ya…


-Mitch Muller

C.P.T. – MindsetFitness.net


Summary with credit to: Permanent Muscle by Reuben Bajada. The Poliquin Principles by Charles Poliquin. ACEFitness.org. Mitch’s Empower Network Blog.


Biceps Training: The Right Way

How To Train Your Biceps

Ok so, out of all the muscles discussed in this section, the biceps are by far the most popular. When someone asks to see your muscles, what’s the first pose you give them? Exactly my point. There are so many variations and exercise routines now-a-days for the biceps that sometimes it’s hard to tell which are for real, and which won’t make your biceps grow to save your life. So let me clear up a lot of questions for you guys…

Let’s start by digging into the anatomy of the biceps. The bicep muscle consists of two heads (hence the prefix “bi”). These are referred to as the inner and outer heads. Joining the bicep on the arm and located between it and the tricep on the outer portion of your arm is the brachiallis. We will go into further detail about this muscle later on. But for now, let’s stick to the basics…

There are six guidelines that I follow on a weekly regimen when my biceps day comes around:

  • Biceps Guideline #1 | Isolation

The single most important rule for effectively training the biceps is isolation. Nothing drives me more insane than when I walk into my gym and the guy on the first curl machine is using most of his body to somehow get the weight as high as he can up to his shoulders. When seeing people like this, it’s no surprise that more muscles are being recruited to help carry the load and

biceps

complete each rep. The biceps are not meant to be trained this way! It is one of the easiest muscles to stimulate and isolate so let’s put them to work the RIGHT way shall we? Slow and controlled movements will pay off over time. The key to keeping these controlled movements all throughout the exercise is to create a solid foundation. To do this, lock your elbows into your sides when using dumbbells/barbells; when using preacher benches or machines, make sure your upper arm is completely flush with the pad. The shoulder should never move.

  • Biceps Guideline #2 | 90 degree curls

Adding to my previous note about creating a strong foundation: your arms should not rise past the 90 degree angle. This allows the bicep to work completely alone. Remember, we are trying to achieve MAXIMUM stimulation to the bicep muscle. What good will it do to have other muscles helping out? It simply just doesn’t make sense. The anterior deltoid will want to help lift the weight when your arms start to fatigue so it is important to stay focused on using the bicep alone. If you can’t lift it, then you can’t lift it! Which brings me to my next point…

  • Biceps Guideline #3 | Lift heavy when possible

A repeated phrase that I often tell my clients is that “ten is the magic number.” What I mean by this is that when your purpose for lifting weights is to maximize muscle growth; your rep range should aim for ten each time, while ALSO increasing the weight. A standard range for muscular development is 8-12 reps per set. So why not aim for 8 or 12 reps? I have found from my personal experience and from many of my clients, that the time spent under tension is just as important as the heavy weight itself. If you fail under 8 reps, your body has not spent enough time under the tension (TUT principle) to enforce the muscular micro trauma that we’re looking for. However, staying with a heavy weight/low rep set WILL increase your strength, but size will not follow as fast.

  • Biceps Guideline #4 | Full Range of Negative Motion

One of the best ways to build the bicep in a short amount of time is emphasize the negative (Essentric) portion of the exercise. When done correctly, each arm will be using heavy weights that normally would be too heavy to lift. This is done by starting with a dumbbell (Best choice) at the 90 degree position on a preacher bench. One arm is used at a time so a helping hand is there to assist when the bicep hits failure. Slowly lower the weight for about 5 seconds till your arm is COMPLETELY extended at the bottom. This will stretch the bicep to its full potential and cause unbelievable micro trauma to your bicep! All good things. The ten rep rule will not apply to this exercise because the 5 second lowering motion will give your muscles plenty of time under tension! I recommend aiming for 4-5 sets of 6-8 reps here.

  • Biceps Guideline #5 | Use Dumbbells

Unfortunately I learned this lesson on my own after a few years of training my biceps the wrong way. Barbells are great for many exercises, however in my opinion, until your mind is able to focus the same tension for both arms in the lifting process, only dumbbells should be used. Your brain will automatically choose which side will receive the majority of nerve impulses, which in turn will cause one side to dominate over the other. Then minute I started using dumbbells I saw the difference. My left arm fell short of my expectations while my right arm dominated. Stick to the dumbbells, and watch both of your arms grow at the same time!

  • Biceps Guideline #6 | Variety

Like any exercise routine, the body will adapt to the work you’re putting it through. So it is important to constantly throw new things into the mix to target the bicep from different angles. Remember the brachiallis that I mentioned earlier? Here’s a simple secret to building bigger-looking biceps: Do hammer curls! This is done with your palms facing towards your body instead of facing forward as they would be in a standard curl. This motion stimulates the brachiallis along with parts of the forearm to give a thicker appearance to the bicep. Put simple: basic curls build the bicep peak, hammer curls build bicep thickness. For a complete bicep workout, make sure to incorporate both of these. Using various machines and cables can provide variety to your bicep routines as well. Change things up, and shock your arms into growth!

Being able to understand these simple bicep principles will help you achieve eye-catching results that will make you stand out from the rest. So try these out and let me know the progress that you guys are making!

Most importantly, establish your mindset before you even pick up that first dumbbell. Focus on your goals, and how much you’re willing to sacrifice to achieve them. Establish your pain barrier, and prepare your mind and body for growth; get after it!

Feel free to email me with any questions!

-Mitch Muller

CPT – MindsetFitness.net

Summary with credit to: Permanent Muscle by Reuben Bajada. The Poliquin Principles by Charles Poliquin. ACEFitness.org


Lats (How To Train The Back)

Latissimus Dorsi (How to train the back)

Back training has had its share of controversy over the years; whether it’s a debate on the correct form of exercises, the sets and reps, or the time needed to spend on them. Let me start by going over the basics…

Your lats are actually made up of three muscles called the Dorsi, Teres Major and Teres Minor which are attached to the scapula. This muscle primarily plays the role of a “puller” or agonist in major exercise movements such as the pull- up or seated row. It also acts as the antagonist (opposing force) in all chest press exercises.

Given that the lats only consist of one head, they can be difficult to isolate at times because the secondary muscles (Biceps/Deltoids) are also engaged in contraction. However it is STILL possible to isolate your lats! You just have to be creative with your exercise selection. I’ll go over this more in a minute…

How to stimulate your lats to peak contraction…

Recently in my Chest article (Dominant muscles of the human body), I explained how maximum stimulation must be achieved in order to get the best results. So much like the chest, your back must be taken to complete failure over and over again to cause as much micro trauma to the muscle fibers as possible.

Every single back pulling exercise consists of muscular tension and contraction STARTING at the hands. When force is applied and your brain signals to pull the weight towards you, the path of contraction travels from your hands up your arms and into your back. The flow of contraction looks something like this:

– Hands, Forearms, Biceps, Latslatissimus dorsi

So how do I use my lats as the Prime Mover instead of my forearms and biceps? The answer lies in your grip! Using a standard fist-like grip on the bar is the first mistake most people make when jumping on a lat pulldown machine. I see it every single day in the gym and it’s a wonder why I have new clients who say, “I can only feel it in my arms.” So let’s correct this shall we?

The simplest way to shift more tension into your lats instead of your biceps is to treat your hands as hooks. From a standard fist-like grip, the only change would be to lift your thumbs and place them on top of the bar with your other fingers! Simple as that. So on your next back day, try a standard grip first, then switch your thumbs and feel the difference!

For any effective back workout, these simple concepts must be put into action. Building up a pump is also important to ensure as much blood circulation through the muscle as possible. As mentioned before, the back CAN be isolated, and I’ll explain how…

Think of the standard cable row machine you currently use at your gym. Most likely it’ll have an attachment hook with all kinds of grip handles. This exercise will be performed with only one arm at a time so find a single pulley to attach to the machine. Instead of being seated facing the stack of weight, grab the pulley (still using your hands as hooks) and shift your body sideways about 45 degrees. Your arm should now be in a straight line with your hip. Pull the weight towards you in a controlled motion. Your elbow should drop down close to your hip. Try it right now without any weight, and squeeze your lats. Do you feel it? That right there my friend is an isolation movement for your back. I suggest trying this at the end of your next lat workout and let me know how it feels!

Remember, your mind is a powerful thing. Prepare it for the work you’re about to do day-in and day-out. Establishing a Mind-Muscle connection with your back is key to a progressive and successful workout. Train hard, and keep your Mindset!

-Mitch Muller

-CPT MindsetFitness.net

Summary with credit to: Permanent Muscle by Reuben Bajada. The Poliquin Principles by Charles Poliquin. ACEFitness.org


Abdominal Training: The Right Way

Abdominals

“I want to get a six pack, can you show me some ab workouts?”

I can’t tell you how many times I’ve been asked this question. The fact of the matter is, most people fail to understand just how to go about training their abdominals and how to successfully obtain the desired 6 pack look. Simply jumping on the nearest ab machine or yoga ball will not cover all of the bases when it comes to correct technique on how to approach the training of this extremely popular muscle group.

So let me start by explaining the basics…

Your Rectus Abdominus extends from the costal cartilages near your sternum all the way down to the groin area. The center of your abdominals are separated by a thin band called the linea alba. It is important to see just how large of a muscle this really is, which will help in exercise selection later on down the road.

So how come I don’t have a six pack when I do abs at least three days a week?” This is a popular question so let me put to rest this common myth that has surrounded the fitness industry for quite some time now: Spot training or spot reducing do NOT work when it comes to burning body fat. 75% of the reason why you don’t see those eye-catching abs is due to the stubborn fat layer that covers them! Simply training your abdominals consistently is not enough.

There are three important factors that contribute to abdominal definition.

  • Diet/Food plan

The single most important part of building a strong, defined midsection will ALWAYS be your diet. The way you eat will reflect the results shown 100% of the time. Keeping track of the meals you eat throughout the day, as well as the timings of those meals will ultimately make or break your abdominal building journey. I discuss this more in the Diet section.

  • Fat Loss

So you have your food in order, now what? It’s time to focus on your body fat! Testing your body fat levels can be done if many different ways so I encourage you to get a testing device on your own or use one at your local gym. Ideal body fat percentage for a male 6 pack is around 10% at the very most. However in my personal opinion, 8% BF shows more eye catching results. I believe that getting that extra belly fat to come off is a simple process if taken seriously: do cardio! If a strong cardio routine is combined with weight training at least three days out of the week, RESULTS WILL COME. I talk about this more in my Cardio Section.

  • Abdominal training

Finally, lets hit em’ hard! Having a varied but structured, simple but effective abdominal routine will help you achieve that well deserved midsection. The reason why I said varied is because your body will automatically adapt to the stress put upon it, so it is important to change up your workouts and shock your abs into growth.

Keep in mind that every single person is made differently. If you find yourself thinking, “I want my abs to look like his,” then you need to realize that your own abs are genetically formed and shaped uniquely. Although everyone can build up a stronger midsection, they might not all look the same.

We must select our exercises wisely. But first, let me talk about breathing…

Using a standard barbell curl as an example; why do we breathe in on the way down and out on the way up?

WE INHALE FOR 2 REASONS:

  1. To fill muscles and bloodstream with needed oxygen.
  2. When the muscle is replenished with oxygen, it is now ready for perform at its complete potential.

WE EXHALE FOR 2 REASONS:

  1. To get rid of carbon dioxide within the blood.
  2. To release pressure within the thoracic cavity so it can be transferred to the abdominal muscles for full contraction.

Using this correct form of breathing is key to developing a stronger and better looking midsection. So keep this in mind when training!

EXERCISE SELECTION AND TRAINING…

Knowing which exercises work the best is usually determined by the person involved in training. Ab exercises that work particularly well for me might not work well for you, and vice versa. However from my experience, the best way to train your abs is in supersets (combining more than one exercise in a row without rest). Training abs this way requires only complete body weight with very limited extra resistance. Here is a list of the best abdominal exercises:

-Basic floor crunch        -Lying leg raises        -Bicycles         -Jack Knives      -Planks (static)

-Hip & tucks                      -Rope Crunches        -Medicine ball bicycles             -Leg Lifts

-Pendulums                      -Yoga ball Crunches       -Reverse crunches              -Leg tucks

-Barbell rollouts             -Hanging knee raises          -Hanging leg lifts

*These are only a few exercises to help stimulate abdominal muscle growth. I encourage many others but I’ll talk about those another time! If you have any questions about these exercises and how they’re performed, feel free to email me at, Mitch.mindsetfitness@gmail.com.

Till then, train hard and train smart!

-Mitch Muller

CPT – MindsetFitness.net

Summary with credit to: Permanent Muscle by Reuben Bajada. The Poliquin Principles by Charles Poliquin. ACEFitness.org

Chest Training: The Right Way

Chest Training: The Right Way

The pectorals are one of the most noticeable muscles on the human body, so it becomes obvious as to why the training of this muscle group should not be taken lightly. A strong, defined and sizeable chest is one of the more masculine features of the modern man. It’s no surprise that the size of a man’s chest has become the cornerstone to a larger looking frame, which in turn makes the other muscles of the upper body look larger as well.

The chest is made up of two muscles:

  1. Pectoralis Major

  2. Pectoralis Minor

The Pectoralis Major is, just as its name implies, relatively larger as compared to that of the Pectoralis Minor. It originates from the collar bone (clavicle) and stretches across the anterior deltoid to the anterior side of the sternum. It is important to understand that the Anterior Deltoid plays a helping role with many chest movements, so it must be watched carefully if effort to train your chest to maximum stimulation. I will discuss more of this later…

The chest muscles become stimulated when excessive amounts of weight are forced down onto the arms (Example: gravity in a standard bench press). If lighter weight is used, the chest most likely will be relaxed. This is because the force of the weight is being completely controlled by the arms. When heavier weight is applied, that force shifts downward through the triceps and into the chest to help support the load. This provides a great example of how the chest is a weight-bearing muscle.

So does this mean more weight is better for the chest?

Yes and no. When it comes to specific training methods, there are an infinite amount of variations is chest exercises. However, our goal here is to cause as much mictrotrauma and fatigue to the pecs as possible AND at the same time, consistently improve on a week-to-week basis.

So what major muscles are recruited when performing any standard chest exercise?

– Pectoralis Major

– Deltoids

– Triceps

Now the reason I mention this is because the deltoids and triceps are much smaller than the chest as a whole. This means that when force is applied, the targeted muscle (Chest) is NOT taken to full stimulation and these two smaller muscles will be the FIRST to fatigue. See a problem anyone??

So what can be done to correct this and cause the targeted chest muscle to fail at the same time and reach FULL stimulation? Here’s the answer…

PRE-FATIGUE THE MUSCLE!

The easiest way to pre-fatigue the chest in my book, are leg-elevated push ups. By doing this, your chest will get a head start for the next compound exercise. In this movement, you’re only using body weight to work the upper portion of your chest muscle. We target the upper portion of the chest for 1 reason:

To provide a much fuller and larger-looking chest!

Training the chest using just flat bench press movements will stimulate growth, however the ending result looks saggy and undeveloped. By targeting the upper portion here, (with mostly incline movements) the end result is more eye-catching and will give you that manly-man look you’ve been working hard for.

So here’s a sample routine that I’ve used many times to shock my chest into growth…

The following 3 exercises are performed back to back with zero rest in between. The workout will consist of 6 sets of these 3 movements. Rest time is 2 minutes between sets.

  • Leg-elevated Push ups

-Continue to point of initial fatigue, not till chest is at failure.

  • Incline Barbell Bench Press

-75% of one rep maximum, 10 reps (Use a spotter)

  • Decline Dumbbell Flys

-80% of one rep maximum, 6-8 reps

Notes: The reason we use decline flys as opposed to regular flys is because your center of gravity lies in the center of your mass; when declined, that center of gravity shifts upwards into your chest, further intensifying your chest workout.

Well I hope that helps! Try this one out for yourself and let me know how sore you are the next day. It’s a tough one. But remember, stay focused on completing each set. Train hard and train smart…

-Mitch Muller

CPT – MindsetFitness.net

Summary with credit to: Permanent Muscle by Reuben Bajada. The Poliquin Principles by Charles Poliquin. ACEFitness.org


Best Cardio for Fat Loss

What type of Cardio is best for fat loss?

Depending on your fitness goals, the type of cardio you choose will vary. Not to say that one type is better than the next, but the specific cardio path you take might lead you to another destination or outcome that you didn’t want. So it’s important to understand the different ways that a person can go about cardiovascular training for fat loss.

Let me use a simple analogy that I’ve heard over and over during my training experience…

If you wanted to get from Point A to Point B, (let’s say its Phoenix AZ to New York) there are many different ways you can go about traveling to get there. The fastest way would be to fly, obviously. Other ways could include driving, taking a train, cycling, or even walking. Whatever way you choose to get there is up to you. Some are faster than others and some are slow and steady. The point is that all of these will get you to the same destination; it just depends on your individual preference and what works best for you.

It’s the exact same thing with cardio for fat loss. Cardio is just a vehicle to get you to your fat loss destination. The fastest way may give you quick results, but it could have its costs. With high intensity cardio, you might end up sacrificing some muscle to get to your ideal body fat percentage at a faster pace; just like flying across the country, the fees will most likely leave your wallet feeling empty.

So with that being said, how do you know which type of cardio training is best? Remember, your body is unique. Everyone will have their own way to get to Point B. My suggestion to you is to experiment with your various options. The key here is to not jump around from one to the next on a week-to-week basis. Try High Intensity Interval Training (HIIT) for 3-4 weeks and record your results. This type of cardio involves intervals of high intensity for a short period (30 sec to 1 minute), then a slower pace for the next 2-3 minutes, then repeat. This is one of the best forms of cardiovascular training for fat loss. The reason why is because the body MUST HAVE oxygen present in order to call upon fat for fuel. If you stay on the same pace for the full 30-45 minutes of cardio, some fat may be called upon, but most likely your energy will come from your glycogen stores instead.

If you are a less experienced exerciser, this method may be too much to begin with. Simply walking around the block or on a treadmill may call upon your fat stores as well.

So if you like to play sports or train outside, do that. If you are a swimmer and you spend the majority of your time in the water, then do that. The best part is that HIIT can be applied to almost any type of cardiovascular activity, even walking. I’ve personally gotten my heart rate up to 210 beats per minute just from a walking interval; so I know it can be done.

My advice to you is to find a few cardio training methods that best suit your needs and goals. Try experimenting and see how your body reacts after a few weeks. Once you’ve done the elliptical, bike or treadmill, move on to something else. The body must be forced to adapt to new changes in order to progress. So keep the fat-loss ball rolling and you’ll see results in no time!

One last thing…

Diet and cardio go together like peanut butter and jelly. You won’t get results from just using one. Does a jelly sandwich sound good to you? Nah, me either. So make sure you’re burning off more calories than you’re taking in when you’re training for fat loss!

-Mitch Muller

CPT – MindsetFitness.net